In the third part of our blog post series “getting started with pulsar on kubernetes” we setup tiered storage (aws s3) with pulsar’s helm chart.
prerequisites
If you followed the installation instructions in the first part of the blog post series: Installing Pulsar on Kubernetes using Helm, you already have a pulsar cluster running (namespace pulsar-demo). This tutorial will re-use the configuration (reduced memory / cpu footprint) to deploy a pulsar cluster with tiered-storage (aws s3) enabled to another namespace (pulsar-ts).
If you want to read up on tiered-storage in general, please have a look at the official pulsar documentation:
- http://pulsar.apache.org/docs/en/concepts-tiered-storage/
- http://pulsar.apache.org/docs/en/cookbooks-tiered-storage/
disclaimer
This is not a hardened and secure setup. It does not account for use case specific ACLs settings or secure storage of credentials. It wants to guide you through the minimal steps neccessary to get tiered-storage up and running with aws s3 using the helm chart provided by the pulsar distribution.
AWS IAM setup
Let’s start with the neccessary aws setup. We need to create an IAM user and a s3 bucket.
Log into Amazon AWS and then browse to IAM:
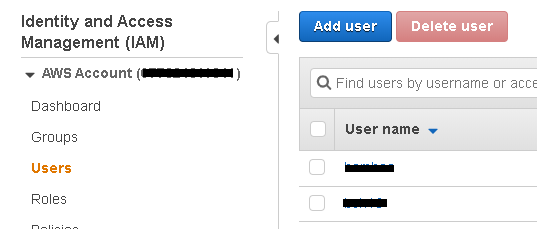
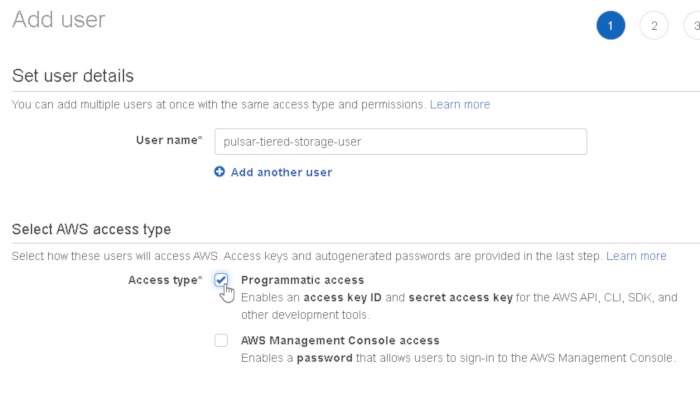
Create a new user (we chose pulsar-tiered-storage-user) and enable programmatic access:
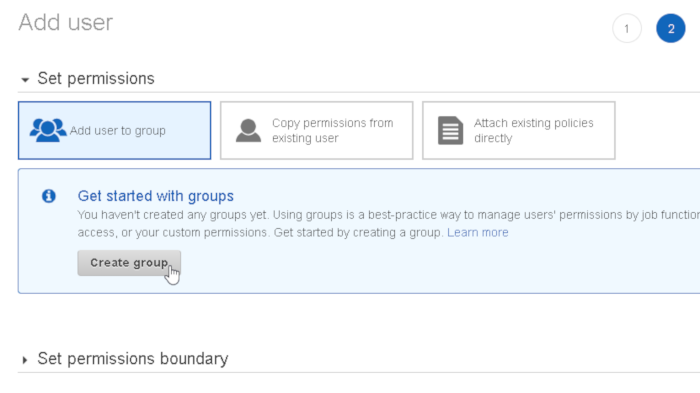
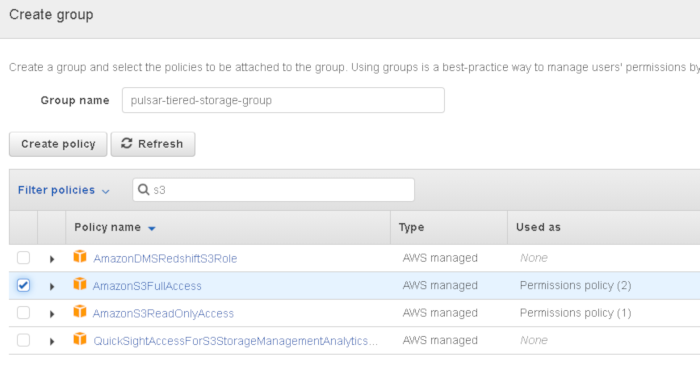
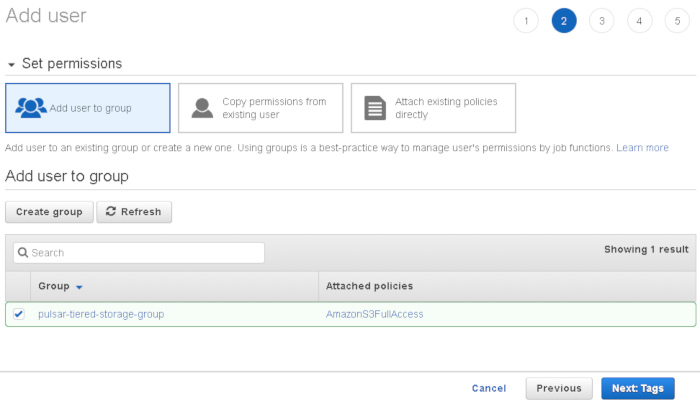
Select “add user to group” and create an new group:
The user needs full access to s3, so type “s3” into the search field to filter the policy list and then select AmazonS3FullAccess:
click next:
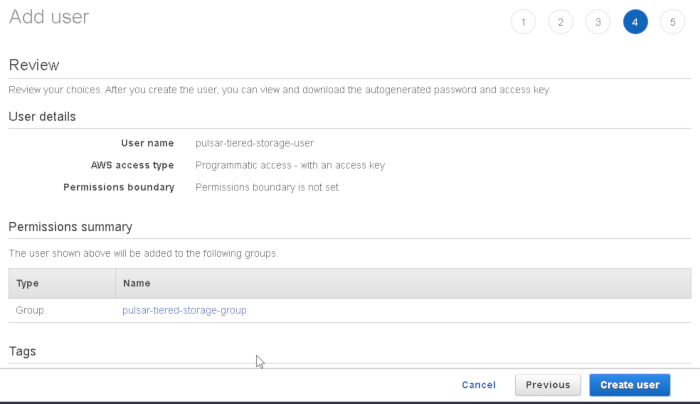
verify settings and click “create user”:
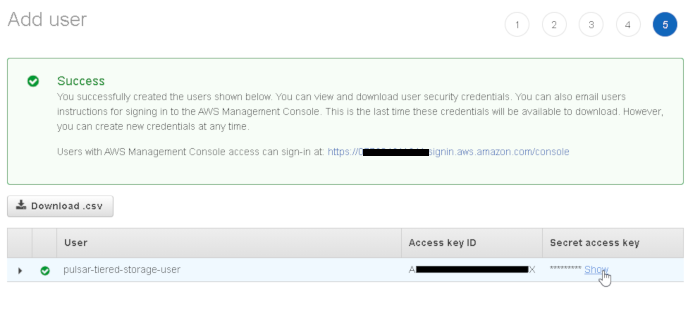
use “show” to display the secret access key and copy both keys:
s3 bucket setup
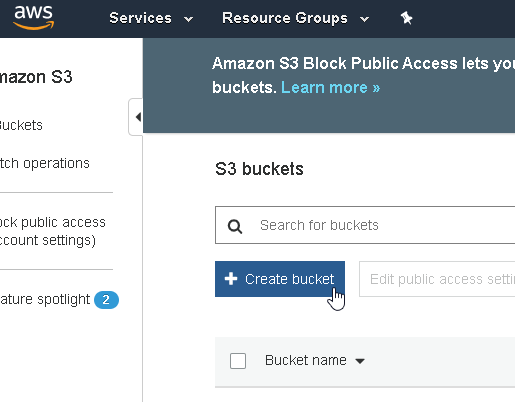
go to https://s3.console.aws.amazon.com/s3/home and create a new bucket:
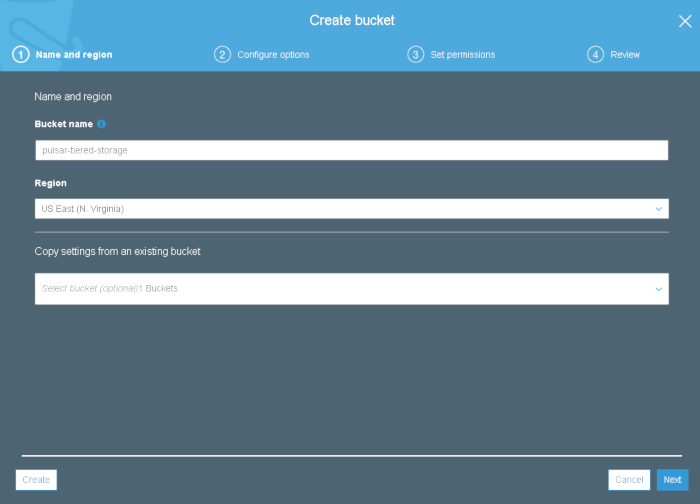
Choose a bucket name and select a region of your choice:
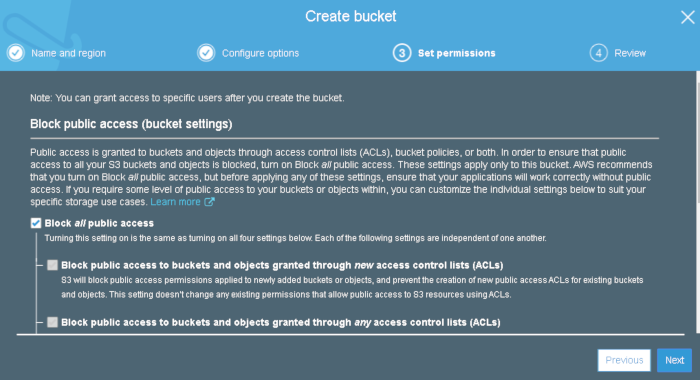
Continue the wizard and disable all public access and then click “next” and then “create bucket”:
pulsar installation
creating the namespace
We want to deploy Pulsar in a separate namespace called pulsar-ts. To create the namespace execute:
$ echo '{ "kind": "Namespace", "apiVersion": "v1", "metadata": { "name": "pulsar-ts", "labels": { "name": "pulsar-ts" } } }' | kubectl create -f -
cloning the helm chart
As we want to install pulsar using helm, so we need to clone the pulsar repository:
$ git clone \
--depth 1 \
--single-branch \
--branch v2.4.1 \
https://github.com/apache/pulsar.git

$ cd pulsar
Configuring tiered storage
We will reuse the deployment configuration from the first blog post (Installing Pulsar on Kubernetes using Helm) with reduced memory settings and additional tiered-storage configuration options.
Our deployment file looks like this:
## Namespace to deploy pulsar
namespace: pulsar-ts
namespaceCreate: no

persistence: yes

zookeeper:
  resources:
    requests:
      ## default was: 15GB
      memory: 4Gi
      ## default was: 4
      cpu: 1
  configData:
    ## adjusted memory settings
    PULSAR_MEM: "\"-Xms3g -Xmx3g -Dcom.sun.management.jmxremote -Djute.maxbuffer=10485760 -XX:+ParallelRefProcEnabled -XX:+UnlockExperimentalVMOptions -XX:+AggressiveOpts -XX:+DoEscapeAnalysis -XX:+DisableExplicitGC -XX:+PerfDisableSharedMem -Dzookeeper.forceSync=no\""
    PULSAR_GC: "\"-XX:+UseG1GC -XX:MaxGCPauseMillis=10\""

bookkeeper:
  replicaCount: 4
  resources:
    requests:
      ## default was: 15GB
      memory: 4Gi
      ## default was: 4
      cpu: 1
  configData:
    ## adjusted memory settings
    PULSAR_MEM: "\"-Xms3g -Xmx3g -XX:MaxDirectMemorySize=3g -Dio.netty.leakDetectionLevel=disabled -Dio.netty.recycler.linkCapacity=1024 -XX:+UseG1GC -XX:MaxGCPauseMillis=10 -XX:+ParallelRefProcEnabled -XX:+UnlockExperimentalVMOptions -XX:+AggressiveOpts -XX:+DoEscapeAnalysis -XX:ParallelGCThreads=32 -XX:ConcGCThreads=32 -XX:G1NewSizePercent=50 -XX:+DisableExplicitGC -XX:-ResizePLAB -XX:+ExitOnOutOfMemoryError -XX:+PerfDisableSharedMem -XX:+PrintGCDetails -XX:+PrintGCTimeStamps -XX:+PrintGCApplicationStoppedTime -XX:+PrintHeapAtGC -verbosegc -XX:G1LogLevel=finest\""
    dbStorage_writeCacheMaxSizeMb: "512"
    dbStorage_readAheadCacheMaxSizeMb: "512"
    dbStorage_rocksDB_blockCacheSize: "268435456"
    journalMaxSizeMB: "512"

broker:
  component: broker
  replicaCount: 3
  resources:
    requests:
      ## default was: 15GB
      memory: 4Gi
      ## default was: 4
      cpu: 1
  configData:
    ## adjusted memory settings
    PULSAR_MEM: "\"-Xms3g -Xmx3g -XX:MaxDirectMemorySize=3g -Dio.netty.leakDetectionLevel=disabled -Dio.netty.recycler.linkCapacity=1024 -XX:+ParallelRefProcEnabled -XX:+UnlockExperimentalVMOptions -XX:+AggressiveOpts -XX:+DoEscapeAnalysis -XX:ParallelGCThreads=32 -XX:ConcGCThreads=32 -XX:G1NewSizePercent=50 -XX:+DisableExplicitGC -XX:-ResizePLAB -XX:+ExitOnOutOfMemoryError -XX:+PerfDisableSharedMem\""
    PULSAR_GC: "\"-XX:+UseG1GC -XX:MaxGCPauseMillis=10\""
    managedLedgerDefaultEnsembleSize: "3"
    managedLedgerDefaultWriteQuorum: "3"
    managedLedgerDefaultAckQuorum: "2"
    deduplicationEnabled: "false"
    exposeTopicLevelMetricsInPrometheus: "true"
    # tiered-storage specific settings
    managedLedgerOffloadDriver : "aws-s3"
    s3ManagedLedgerOffloadRegion : "us-east-1"
    s3ManagedLedgerOffloadBucket : "pulsar-tiered-storage"
    PULSAR_EXTRA_OPTS: "-Daws.accessKeyId=yyyyyyyyyyyyyyyyyyyy -Daws.secretKey=xxxxxxxxxxxxxxxxxxxxxxxxxxxxxxxxxxxxxxxx"
    # reducing MaxEntries from 50.000 to 2.000 and MinRolloverTime to 1 min to speed up ledger rollover
    managedLedgerMaxEntriesPerLedger: "2000"
    managedLedgerMinLedgerRolloverTimeMinutes: "1"
These are the configuration options that we added under broker.configData to enable tiered-storage:
Which offloading driver to use:
managedLedgerOffloadDriver: "aws-s3"
Which s3 region to use:
s3ManagedLedgerOffloadRegion : "us-east-1"
The bucket name:
s3ManagedLedgerOffloadBucket : "pulsar-tiered-storage"
And the credentials (replace with your access and secret key):
PULSAR_EXTRA_OPTS: "-Daws.accessKeyId=xxxxxxxxxxxxxxxxxxxx -Daws.secretKey=yyyyyyyyyyyyyyyyyyyyyyyyyyyyyyyyyyyy"
This is not a secure way of injecting credentials, but it works without futher modifications of the helm chart. Normally you would store these credentials as a kubernetes secret and make them available to the application.
Deploy:
$ helm install deployment/kubernetes/helm/pulsar --name pulsar --namespace pulsar-tiered-storage-demo -f <your-configuration-file.yaml>
Setting up the environment
Your freshly installed pulsar cluster needs an initialized namespace before you can start pushing data:
$ pulsar-admin namespaces create public/default
Set the retention policies to unlimited, otherwise cold ledgers wont be offloaded to s3 but simply discarded:
$ pulsar-admin namespaces set-retention public/default --size -1 --time -1
data creation
Use pulsar-client produce to create a couple of records. Each execution is limited to 1000 records, so execute it multiple times:
  $ pulsar-client produce hello-world-topic --messages "Hello World" --rate 0 --num-produce 1000
  $ pulsar-client produce hello-world-topic --messages "Hello World" --rate 0 --num-produce 1000
  $ pulsar-client produce hello-world-topic --messages "Hello World" --rate 0 --num-produce 1000
  $ pulsar-client produce hello-world-topic --messages "Hello World" --rate 0 --num-produce 1000
  $ pulsar-client produce hello-world-topic --messages "Hello World" --rate 0 --num-produce 1000
Check the current metadata of our target topic:
$ pulsar-admin topics info-internal hello-world-topic
Output should look like this (at least one closed ledger):
  {
    "version": 2,
    "creationDate": "2019-11-02T13:32:13.082Z",
    "modificationDate": "2019-11-02T13:33:13.447Z",
    "ledgers": [
      {
        "ledgerId": 4,
        "entries": 3228,
        "size": 182972
      },
      {
        "ledgerId": 5
      }
    ],
    "cursors": {}
  }
Use pulsar-admin to trigger a manual offload for our topic (using a very small value (10k) because we did not create much data):
$ pulsar-admin topics offload hello-world-topic -s 10k
Output:
Offload triggered for persistent://public/default/hello-world-topic for messages before 5:0:-1
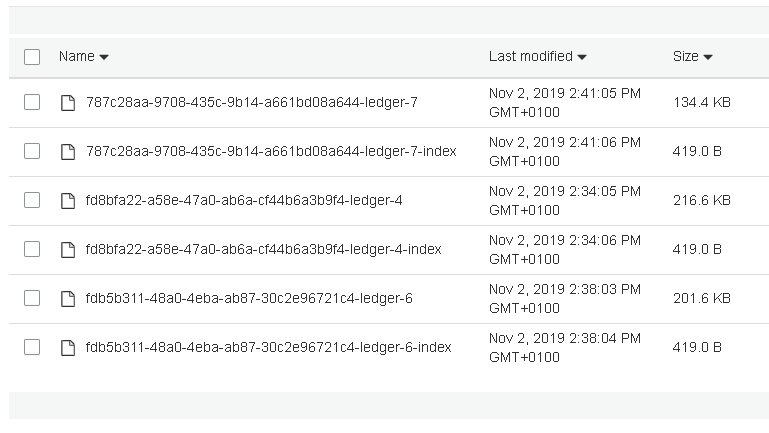
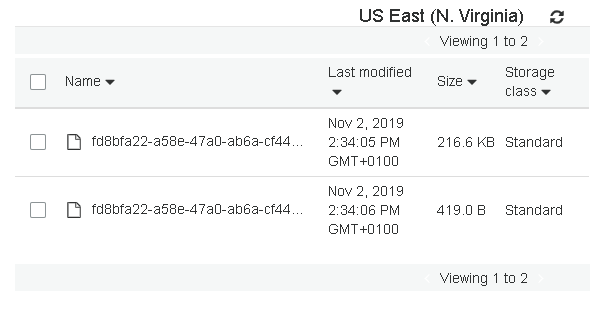
Browse to the bucket ( https://s3.console.aws.amazon.com/s3/buckets ), the first segment(s) should now show up there:
automatic offloading
Let’s enable automatic offloading on namespace level:
$ pulsar-admin namespaces set-offload-threshold --size 10k public/default
Create some more data to see the automatic offloading in action:
  bin/pulsar-client produce hello-world-topic --messages "Hello World" --rate 0 --num-produce 1000
  bin/pulsar-client produce hello-world-topic --messages "Hello World" --rate 0 --num-produce 1000
  bin/pulsar-client produce hello-world-topic --messages "Hello World" --rate 0 --num-produce 1000
  bin/pulsar-client produce hello-world-topic --messages "Hello World" --rate 0 --num-produce 1000
  bin/pulsar-client produce hello-world-topic --messages "Hello World" --rate 0 --num-produce 1000
Check the bucket again: